
BMW X5: Replacing Pulse Generator On Inlet Camshaft (N52K)
IMPORTANT: Read and comply with notes on protection against electrostatic damage (ESD protection).
Necessary preliminary tasks:
- Read out fault memory of DME control unit; if necessary, work through test schedules
- Switch off ignition
Lever out expansion rivets (1).
Press lock (2) and raise intake duct (3).
Detach intake duct (3) from air filter housing and remove.
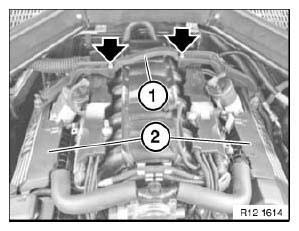
Fig. 15: Locating Ignition Coil Covers Screws And Holder
Unclip Bowden cable for engine bonnet/hood actuator from transverse reinforcement (1).
Release screws on left and right sides. Tightening torque 51 71 4AZ.
Remove cross-brace (1).
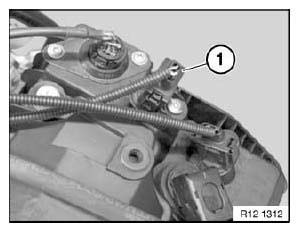
Fig. 16: Identifying Plug Connector
Installation:
Replace screw.
Tightening torque 12 14 3AZ.
Remove pulse generator (2).
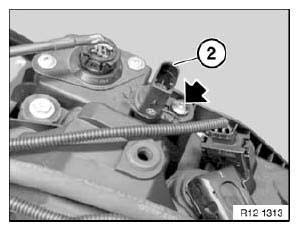
Fig. 17: Locating Pulse Generator And Screw
NOTE: Check stored fault messages.
Now clear the fault memory.
REPLACING EXHAUST CAMSHAFT PULSE GENERATOR (N52, N52K, N51, N53)
IMPORTANT: Read and comply with notes on protection against electrostatic damage (ESD protection).
Necessary preliminary tasks:
- Read out fault memory of DME control unit; if necessary, work through test schedules
- If necessary, remove radiator cover
Unlock plug (1) and remove. Release bolt.
Release bolt.

Fig. 18: Locating Ignition Coil Covers Screws And Holder
Installation:

Fig. 19: Identifying Plug Connector
Replace screw.
Tightening torque 12 14 4AZ. Remove pulse generator (2).
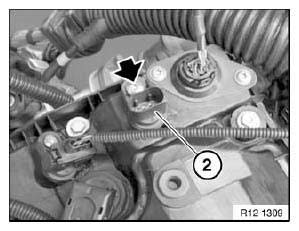
Fig. 20: Locating Pulse Generator
NOTE: Check stored fault messages.
Now clear the fault memory.
REPLACING PULSE GENERATOR ON EXHAUST CAMSHAFT (N52K)
IMPORTANT: Read and comply with notes on protection against electrostatic damage (ESD protection).
Necessary preliminary tasks:
- Read out fault memory of DME control unit.
- Switch off ignition
Lever out expansion rivets (1).
Press lock (2) and raise intake duct (3).
Detach intake duct (3) from air filter housing and remove.

Fig. 21: Locating Ignition Coil Covers Screws And Holder
Installation:
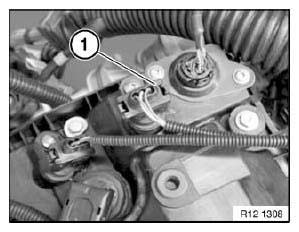
Fig. 22: Identifying Plug Connector
Replace screw.
Tightening torque 12 14 4AZ. Remove pulse generator (2).

Fig. 23: Locating Pulse Generator
NOTE: Check stored fault messages.
Now clear the fault memory.
READ NEXT:
 Replacing Control Unit (DME)
IMPORTANT: Read and comply with notes on protection against
electrostatic damage (ESD
protection).
Necessary preliminary tasks:
Switch off ignition
Disconnect battery negative lead.
Remove microf
Alternator With Drive
REPLACING ALTERNATOR BELT PULLEY
Special tools required:
12 7 110.
Remove and install alternator drive belt.
Depending on alternator type, grip shaft with:
hexagon socket
multi-tooth socket or
Regulator
REPLACING VOLTAGE REGULATOR
Necessary preliminary tasks:
Switch off ignition.
Disconnect battery negative lead.
Notes on removing and installing electronic control units.
Remove alternator.
Bo
SEE MORE:
Adjusting Toe-In On Front Axle
NOTE: Camber and toe-in influence each other. Adjust the toe-in first
in order to
simplify the adjustment procedure.
Version with active front steering:
Align steering wheel.
Set cumulative steering angle by means of the service function "Carry
out initial operation/adjustment for
active fron
Replacing Lower Vent Line
IMPORTANT: Risk of damage!
Extreme cleanliness must be ensured in the connection area of the vent
lines
during removal and installation. Even the smallest of dirt particles can cause
leakage in the air spring system
Necessary preliminary tasks:
Remove front right wheel arch cover (rear section).
