
BMW X5: Battery Charging
If a normal or quick charger is used to charge the battery, the battery must be disconnected from the vehicle electrical system and removed. This prevents damage to paintwork and upholstery.
Ideally, battery charging is performed with BMW-approved charging computers.
IMPORTANT: In order to prevent the intelligent battery sensor from malfunctioning, the charging terminals in the engine compartment must be used without fail in vehicles from E60 and should be used if possible in other vehicles.
IMPORTANT: Before charging the battery while it is installed, first carry out a closed-circuit current test. If here the voltage is 10 V or less, one or more of the cells may be faulty or the entire battery may already be damaged. In this case, always remove the battery as escaping gases during charging could damage the interior equipment and trim. Attempt to regenerate faulty cells with low charging current.
If necessary, open existing plugs on the individual cells.
BATTERY OPEN-CIRCUIT CURRENT TEST
NOTE: Observe safety instructions for handling vehicle battery.
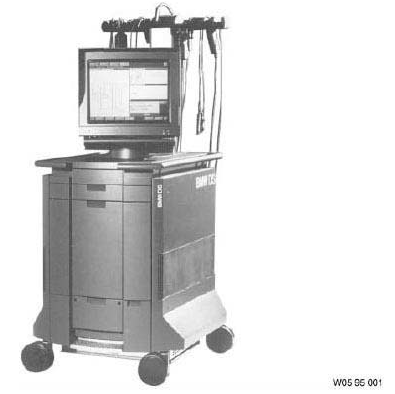
Fig. 154: Identifying Diagnosis And Information System
The open-circuit current test is performed using the Diagnosis and Information System (DIS).
DISCONNECTING AND CONNECTING BATTERY NEGATIVE LEAD
WARNING: Observe safety instructions for handling vehicle battery.
IMPORTANT: Do not under any circumstances use force to pull/lever off Intelligent Battery Sensor (IBS).
Necessary preliminary tasks:
- Raise luggage compartment floor trim
Release screws (1).
Remove battery cover (2) upwards.

Fig. 155: Identifying Battery Cover
Loosen nut (1).
Tightening torque.
Disconnect battery negative lead (2) with IBS and secure at side.
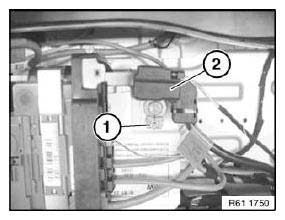
Fig. 156: Identifying Battery Negative Lead
PERFORMING BATTERY "POWER RESET" (FOR PROGRAMMING/CODING CONTROL UNIT(S) )
IMPORTANT: Observe safety instructions for handling vehicle battery.
The following steps must be carried out for a "power reset":
- Switch off and disconnect battery charger
- Switch off ignition
Cars with ignition key: Turn ignition key to 0 position
Cars with identification sensor: Remove identification sensor from slot
Cars with comfort access system: Make sure terminal is in 0 position - Disconnect battery negative terminal
- Reconnect battery negative terminal (to ensure bus activity)
- Waiting time (5-10 seconds)
- Disconnect battery negative terminal
- Waiting time (1 minute)
- Connect battery negative terminal and tighten.
Tightening torque. - Connect and switch on battery charger
- Switch ignition on
READ NEXT:
 Battery Vapor Separator
REPLACING BATTERY NEGATIVE LEAD
WARNING: Observe safety instructions for handling vehicle battery.
Follow instructions for disconnecting and connecting battery.
IMPORTANT: Do not under any circumst
Replacing Level Switch For Dynamic Drive Fluid Reservoir
Unscrew nuts.
Remove shims.
Installation:
Replace self-locking nuts.
Fig. 162: Locating Nuts
NOTE: Raise and/or turn fluid reservoir in order to gain better access
to plug
connection.
Disconnect pl
SEE MORE:
System limits - Tire pressure monitor
System limits
Temperature
The tire inflation pressure depends on the tire's
temperature.
Driving or exposure to the sun will increase the
tire's temperature, thus increasing the tire inflation
pressure.
The tire inflation pressure is reduced when the
tire temperature falls again.
These circumstanc
Replacing Pressure Line For Power Steering (From Cutting Line To
Steering Gear) (N62)
WARNING: Danger to life!
Mount securing fixture for vehicle on lifting platform to prevent the
vehicle from slipping off or tilting down.
Secure engine in installation position to prevent it from falling down.
WARNING: Danger of poisoning if oil is ingested/absorbed through the
skin!
Risk of injur
