
BMW X5: Instructions For Compressor Replacement
IMPORTANT: Compressors with plastic belt pulleys:
- Avoid impacts/knocks to plastic belt pulley (caused by tools, contact with base).
- Return faulty compressors in their original packaging only.
IMPORTANT: When starting up a new compressor for the first time, it is absolutely essential to carry out the following breaking-in procedure:
- Switch on A/C system
- Set all air vents in instrument cluster to "OPEN"
- Start engine and let it stabilize at idle speed
- Set blower output to min. 75 % of max. blower output
- Switch on A/C system and run for at least 2 minutes at idle speed (risk of damage at higher speed!)
When evacuating the air-conditioning system, refrigerant oil is also extracted and collected in the oil separator of the service station.
After evacuation, the refrigerant must be filtered in the service station as the oil separator could still contain a liquid refrigerant/oil mixture. The filtering process gasifies the refrigerant completely and only the previously bound refrigerant oil remains in the oil separator. Measure and note down this quantity of refrigerant oil.
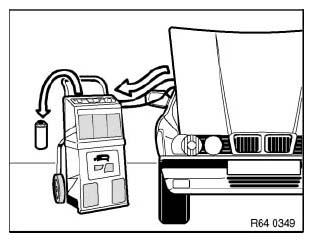
Fig. 93: Removing Liquid Refrigerant/Oil
Transfer the refrigerant oil remaining in the previous compressor via the filler plug completely into a measuring container.
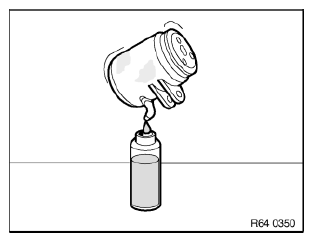
Fig. 94: Measuring Container
Measure the amount of refrigerant oil collected from the previous compressor.
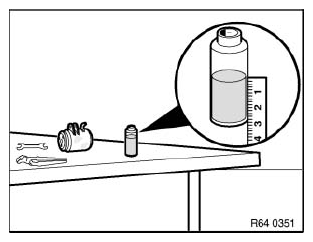
Fig. 95: Measuring Amount Of Refrigerant Oil
The new compressor is filled at the factory with refrigerant oil.
Open filler plug and pour entire contents of compressor into a clean container.
Installation:
Replace sealing ring and moisten with refrigerant oil.
Tightening torque.
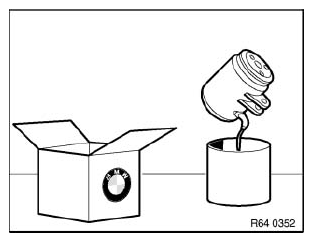
Fig. 96: Opening Filler Plug
From the new compressor, pour the same amount of refrigerant oil (as drained from the previous compressor) + 10 g extra into a clean measuring container and pour again into the new compressor.
Remaining refrigerant oil can be poured into service station tank.
Otherwise the excess refrigerant oil must be disposed of correctly.
On account of its hygroscopic properties, refrigerant oil must not be stored in open containers.
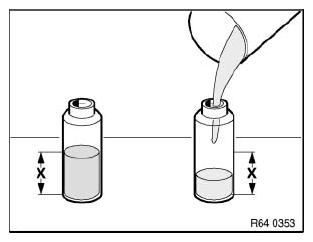
Fig. 97: Measuring Container Into Compressor
The refrigerant oil drawn off from the oil separator of the service station and from the previous compressor must not be reused and must be correctly disposed of.
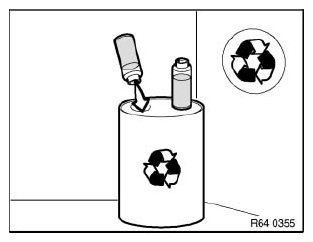
Fig. 98: Identifying Refrigerant Oil Drawn Off From Oil Separator
After installing the new compressor, it is essential before filling the A/C system to pour the same amount of the previously drawn off refrigerant oil into the system again.
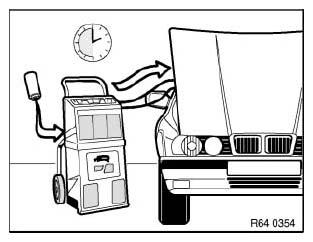
Fig. 99: Filling Liquid Refrigerant/Oil
Installation:
If A/C system is opened for more than 24 hours: Replace drier bottle/drier insert.
READ NEXT:
 Instructions For Opening And Replacing Parts In Refrigerant Circuit
WARNING:
Avoid contact with refrigerant and refrigerant oil.
Follow safety instructions for handling R 134a refrigerant.
Follow safety instructions for handling refrigerant oil.
CAUTION:
Alway
Removing And Installing/replacing A/C System Compressor (N62TU)
WARNING: Avoid contact with refrigerant and refrigerant oil.
Follow safety instructions for handling refrigerant R 134a.
Follow safety instructions for handling refrigerant oil.
IMPORTANT: Risk of da
SEE MORE:
Instructions For Disconnecting And Connecting Battery
Observe safety instructions for handling vehicle battery.
Before disconnecting battery:
Turn off the ignition and other electrical loads/consumers to prevent
sparking when reconnecting.
NOTE: If the ignition is not turned off when the battery is
disconnected, fault memories
may be set in some cont
Roof Outer Skin
REPLACING ROOF OUTER SKIN (VERSION WITH PANORAMA GLASS SUNROOF)
Read contents of Body, General.
Use only approved spot-welding apparatus for repairs.
Spot-weld bonding is used on this vehicle. Observe specific procedure.
Remove or cover those vehicle components in the repair area which are
susce
