
BMW X5: Exhaust System, Complete
REMOVING AND INSTALLING COMPLETE EXHAUST SYSTEM (N62TU)
Special tools required:
- 31 2 220
WARNING: Scalding hazard! Only perform this work after engine has cooled down.
Danger of injury! Removal of the exhaust system must be carried out with the assistance of a second person.
Support exhaust system with special tool 31 2 220.
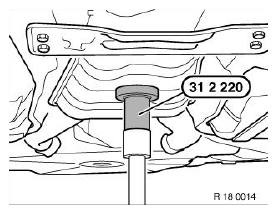
Fig. 1: Identifying Special Tool (31 2 220)
NOTE: Procedure is for the left side. Right side is identical.
Unfasten screw connection.
Slacken ball band clamp (1) from exhaust pipe.
Installation:
- Replace ball band clamps.
- Apply a thin coating of copper past to contact surface between ball and socket.
- When tightening down ball band clamps, press exhaust system against both manifold flanges in order to achieve gap-free installation.
.png)
Fig. 2: Locating Screw
- Install ball band clamp at right angles to exhaust pipe.
- Tightening torque 18 31 1AZ.
Release screws and remove holder (1).
Tightening torque 18 20 1A.
.png)
Fig. 3: Locating Screws
Release screws and remove holder (1).
Tightening torque 18 20 1A.
.png)
Fig. 4: Identifying Holder
Release screws and remove holder (1).
Tightening torque 18 20 2A.
.png)
Fig. 5: Locating Screws
Release screws and remove holder (1).
Tightening torque 18 20 3A.
NOTE: Texts refer to and illustrations show the left side. The procedure is identical for the right side.
Lower and remove exhaust system with assistance of a second person.
.png)
Fig. 6: Locating Screws
Installation:
Align both tail pipes (1) of rear muffler in each case centrally to openings in rear apron.
.png)
Fig. 7: Identifying Tail Pipes
Installation:
Check rubber mount for damage, replace if necessary.
Check exhaust system for leaks.
READ NEXT:
 Mufflers
REPLACING REAR MUFFLER (N62TU)
Special tools required:
00 2 210
31 2 220
WARNING: Scalding hazard!
Only perform these tasks after exhaust system has cooled down.
Support exhaust system with specia
Exhaust Manifold
REMOVING AND INSTALLING/REPLACING RIGHT EXHAUST MANIFOLD (N62TU)
Necessary preliminary tasks:
Remove exhaust system.
Remove right control sensor.
Remove right monitor sensor.
Remove right engine
SEE MORE:
Straightening Steel Parts
1.0 Recommended tools
Only use those tools designed for steel repairs.
2.0 Straightening outer shell
"Cold" straightening: Press dents out from their center and smooth in an
inwards direction with
gentle taps.
In the case of small, soft dents (hail and parking damage), this is also
possible
Removing And Installing/Replacing Front Left Or Right Seat Belt
Necessary preliminary tasks:
Remove trim panels for door pillar.
If necessary, remove air vent.
Move front seat upwards.
Release screw (1) on front seat.
Installation:
Replace screw.
Tightening torque.
Feed out belt anchor fitting (2).
Fig. 2: Identifying Seat Belt Bolts
Release screws (2).
