BMW X5: Window Washer System
OVERVIEW OF WINDSCREEN WIPER, WINDSCREEN WASHER AND HEADLIGHT WASHER SYSTEMS
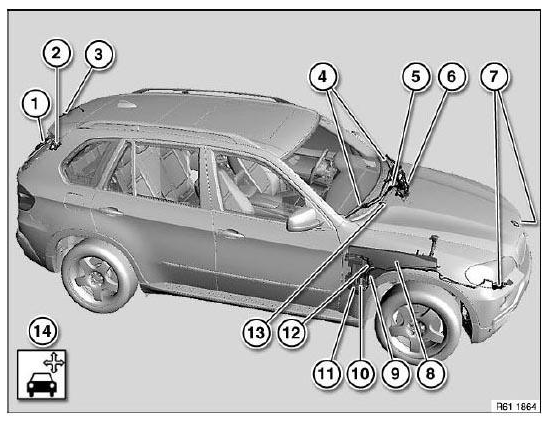
Fig. 289: Overview Of Windscreen Wiper, Windscreen Washer And Headlight
Washer Systems
- Rear window wiper blade
Wiper arm for rear window wiper - Rear window wiper motor
- Spray nozzle for rear window washer system
- Wiper blades
- Windscreen wiper arms
- Mounting bracket for windscreen wiper system complete
- High-pressure nozzles for headlight washer system
- Fluid reservoir for windscreen washer system
- Level switch for windscreen washer system
- Windscreen washer pump
- Windscreen washer pump for rear window wiper
- Washer pump for headlight washer system
- Spray nozzle for windscreen washer system
- Checking and adjustment work
ADJUSTING WINDSCREEN WASHER SPRAY NOZZLES
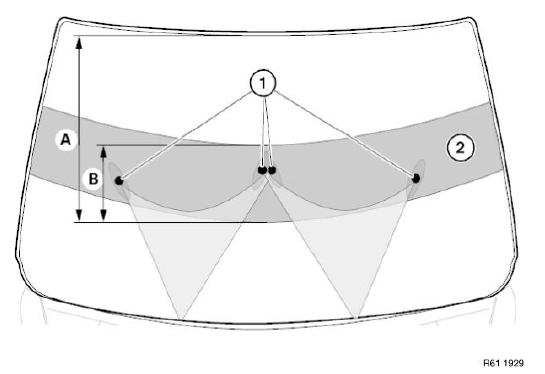
Fig. 290: Identifying Windscreen Washer Spray Nozzles Adjusting Dimension
Mark tolerance range (2) with crepe tape (A=500 mm / B=200 mm).
Actuate washer system.
Contact points (1) must be in tolerance range (2).
If necessary, adjust left or right spray nozzle (1) by way of screw (2).
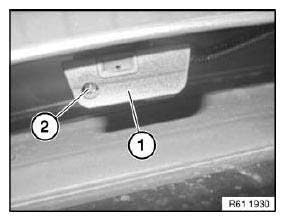
Fig. 291: Identifying Spray Nozzle
REMOVING AND INSTALLING/REPLACING A SPRAY NOZZLE IN WINDSCREEN WASHER SYSTEM
Unlock retaining clip for water hose (1) and detach water hose in direction of arrow.
Disconnect plug connection (2) and detach in direction of arrow.
Press spray nozzle (3) in direction of arrow (A) and remove at top in direction of arrow (B).
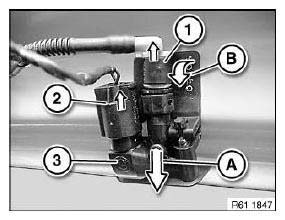
Fig. 292: Disconnecting Plug Connection
Installation:
- Retaining lugs (1) must not be damaged.
- Check adjustment of spray nozzles and correct if necessary.
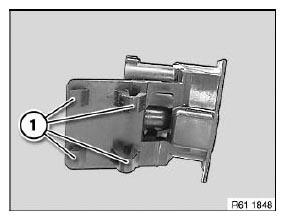
Fig. 293: Identifying Retaining Lugs
REPLACING (REMOVING AND INSTALLING) FLUID RESERVOIR FOR WINDSCREEN WASHER UNIT
Necessary preliminary tasks:
- Remove trim panel for cover on frame side member on right.
- Remove wheel arch trim at front right.
- Remove auxiliary direction indicator light at front right.
- Drain fluid reservoir for windscreen washer system.
Release screw (1).
Twist filler duct (2) in direction of arrow out of fluid reservoir (3).
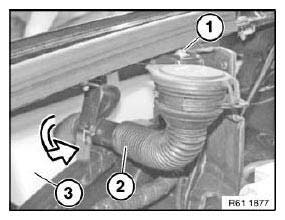
Fig. 294: Twisting Filler Duct Out Of Fluid Reservoir
Release screws.
Press off side panel slightly.
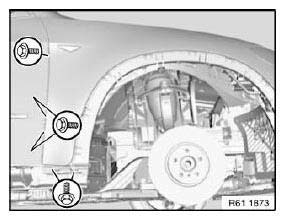
Fig. 295: Identifying Screws
NOTE: Side panel shown removed for purposes of clarity.
Remove washer pump of headlight washer system (1).
Remove washer pump for rear window washer system (2) ).
Disconnect plug connection (3) and unclip wiring harness.
Remove windscreen washer pump (4).
Remove level switch (5) for windscreen washer system.
Unclip high-pressure line (6) from fluid reservoir.
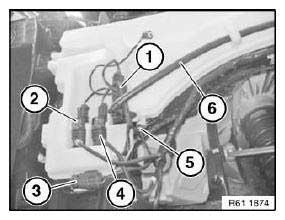
Fig. 296: Identifying Plug Connection, Level Switch, Windscreen Washer Pump
And High-Pressure Line
Release screw (1).
Feed out fluid reservoir (2) towards front.
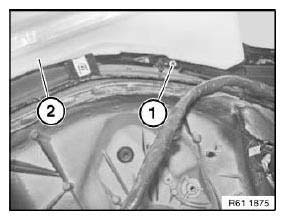
Fig. 297: Identifying Fluid Reservoir
Installation:
Fluid reservoir (1) must be correctly seated in lug (2).
Coat sealing rings of washer pump with anti-friction agent.
Ensure hose is laid without kinks.
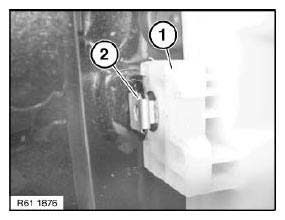
Fig. 298: Identifying Fluid Reservoir And Lug
REMOVING AND INSTALLING/REPLACING WINDSCREEN WASHER PUMP
Necessary preliminary tasks:
- Remove trim panel for cover on frame side member on right.
- Remove wheel arch trim at front right.
- Drain fluid reservoir for windscreen washer system.
Release bolts.
Press off side panel slightly.
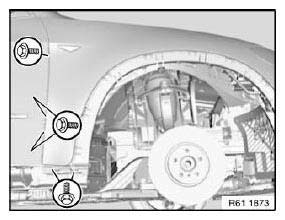
Fig. 299: Identifying Screws
NOTE: Side panel shown removed for purposes of clarity.
Disconnect plug connection (1).
Pull windscreen washer pump (2) in direction of arrow out of fluid reservoir for windscreen washer system.
Disconnect hose plug connection (3) from windscreen washer pump (2).
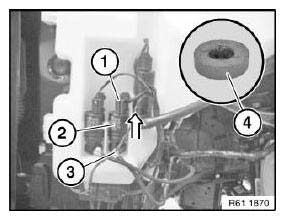
Fig. 300: Pulling Windscreen Washer Pump Out Of Windscreen Washer System
Fluid Reservoir
Installation:
Coat sealing ring (4) of windscreen washer pump (2) with antiseize agent.
Ensure hose is laid without kinks.

