
BMW X5: Torque Converter Bearing
REPLACING TORQUE CONVERTER SHAFT SEAL (GA6HP26Z)
Special tools required:
- 00 1 450
- 24 0 200
- 24 2 351
- 24 2 352
- 24 2 353
- 24 2 360
Necessary preliminary tasks:
- Remove automatic transmission.
IMPORTANT: After completion of work, check transmission oil level.
Use only approved transmission oil.
Failure to comply with this instruction will result in serious damage to the transmission.
Secure transmission with special tool 24 0 200 to assembly stand 00 1 450.
Remove torque converter.
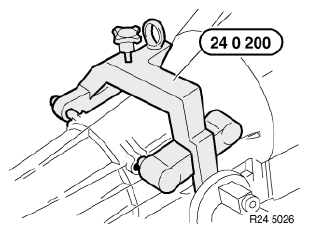
Fig. 29: Identifying Special Tool (24 0 200)
Attach special tool 24 2 353 to drive shaft (1).
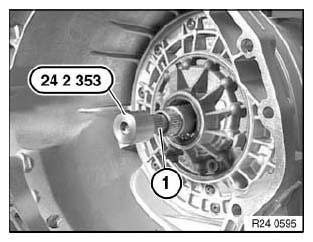
Fig. 30: Identifying Special Tool (24 2 353)
Screw in special tool 24 2 351 until it is firmly connected with shaft seal.
Screw in special tool 24 2 352 to remove shaft seal.
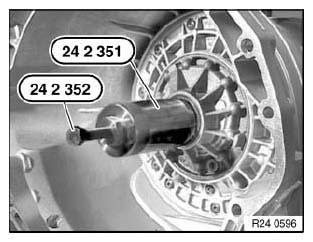
Fig. 31: Identifying Special Tool (24 2 351) And (24 2 352)
Oil sealing lip on shaft seal.
Drive in shaft seal (1) with special tool 24 2 360 as far as it will go.
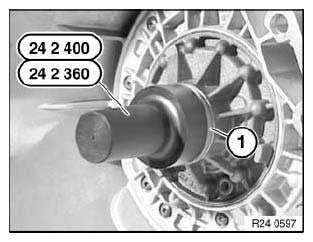
Fig. 32: Identifying Special Tool (24 2 360)
READ NEXT:
 Extension Housing, Bea
REPLACING OUTPUT FLANGE SHAFT SEAL (GA6HP26Z)
Special tools required:
23 0 490
24 4 310
IMPORTANT: After completion of work, check transmission fluid level.
Use only the approved transmission flui
Mechanical Attachments
REPLACING SELECTOR SHAFT SEAL (GA6HP26Z)
Special tools required:
24 5 361
24 5 362
24 5 364
24 5 366
IMPORTANT: After completion of work, check transmission fluid level.
Use only the approved t
Oil Pump
REPLACING TORQUE CONVERTER SHAFT SEAL (GA6HP26Z)
Special tools required:
00 1 450
24 0 200
24 2 351
24 2 352
24 2 353
24 2 360
Necessary preliminary tasks:
Remove automatic transmission.
IM
SEE MORE:
The right place for children
Safety information
Warning
Unattended children or animals in the vehicle
can cause the vehicle to move and endanger
themselves and traffic, for instance due to the
following actions:
Pressing the Start/Stop button.
Releasing the parking brake.
Opening and closing the doors or windows.
Engaging
Performance Controls
Cooling System
The cooling system of the N54 engine consists of a radiator circuit and an
isolated oil cooling circuit. The fact
that there is an isolated oil-cooling circuit ensures that heat is not
introduced via the engine oil into the engine's
coolant system.
Fig. 71: Identifying Cooling S
