
BMW X5: Distribution Box, Power
REPLACING DISTRIBUTION BOX (LUGGAGE COMPARTMENT)
WARNING: Observe safety instructions for handling vehicle battery.
Necessary preliminary tasks:
- Disconnect battery negative lead.
- Remove flap in luggage compartment panel on right.
Release expansion rivet (1).
Remove insulating mat (2).
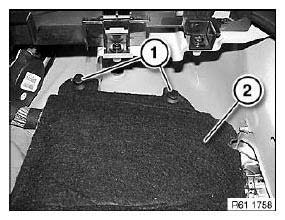
Fig. 143: Identifying Expansion Rivet And Insulating Mat
Disconnect plug connection (1).
Release bolts (2).
Disengage distribution box in direction of arrow.
Disengage emergency actuator (3).

Fig. 144: Disengaging Distribution Box
Disconnect plug connection (1).
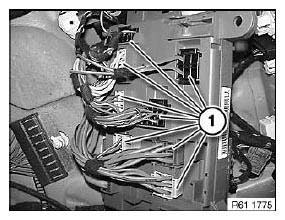
Fig. 145: Identifying Plug Connection
Disconnect plug connection (1).
Remove distribution box.
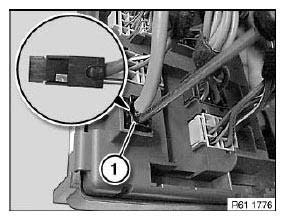
Fig. 146: Identifying Plug Connection
Replacement:
Remove fuses and relays.
REMOVING AND INSTALLING/REPLACING DISTRIBUTION BOX (ON BATTERY)
WARNING: Observe safety instructions for handling vehicle battery.
Notes and instructions on Intelligent Battery Sensor IBS.
Necessary preliminary tasks:
- Disconnect negative battery cable.
Disconnect plug connection (1).
Fold up covers (2).
Release nut (3) and remove cable shoe.
Tightening torque.
Fold up covers (5).
Unscrew nuts (4).
Tightening torque.
Using a screwdriver, expand locking bracket (6) at lower end and clip out.
Remove distribution box (2) towards top.
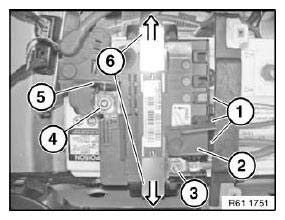
Fig. 147: Expanding Locking Bracket
READ NEXT:
 Instructions For Disconnecting And Connecting Battery
Observe safety instructions for handling vehicle battery.
Before disconnecting battery:
Turn off the ignition and other electrical loads/consumers to prevent
sparking when reconnecting.
NOTE: If the
Instructions On Starting Aid
Do not start the engine with help of starting sprays.
Preparation:
Conform with the following when starting engine with starting cable.
Ensure that jump lead wires are to appropriate cross-section s
SEE MORE:
Coolant
General information
Coolant consists of water and coolant additive.
Not all commercially available additives are suitable
for the vehicle. Do not mix additives of different
colors. Observe the water - additive mixture
ratio of 50:50. Information about suitable additives
is available from a dealer's
Vehicle tool kit
The onboard vehicle tool kit is located under the
cargo floor panel.
Wiper blades
Safety information
NOTICE
The window may sustain damage if the wiper
falls onto it without the wiper blade installed.
There is a risk of damage to property, among
other potential damage. Hold the wiper firmly
when ch
