
BMW X5: Replacing Trim For Central Information Display (CID)
BMW X5 (G05) 2019-2026 Service & Repair Manual / Audio, Navigation And Anti-Theft / Video And TV Equipment / Replacing Trim For Central Information Display (CID)
Necessary preliminary tasks:
- Remove Central Information Display.
Carefully release catches (1).
Installation:
Catches (1) must not be damaged.
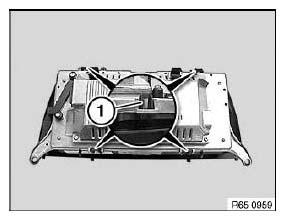
Fig. 35: Identifying Catches
Carefully raise trim (2).
Disconnect plug connection (1) and remove trim (2) from CID.
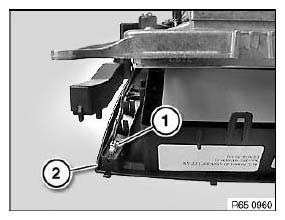
Fig. 36: Identifying Plug Connection With Raise Trim
REMOVING AND INSTALLING REPLACING CENTRAL INFORMATION DISPLAY (CID)
Necessary preliminary tasks:
- Remove center fresh air grille.
Release screws (1) and feed out CID (2) towards bottom.
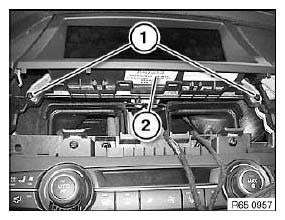
Fig. 37: Identifying Central Information Display
Disconnect plug connections (1) and unclip cable from holders (2).
Remove CID (3).
Installation:
Holders (2) must not be damaged! Make sure cable is correctly routed through holders (2).
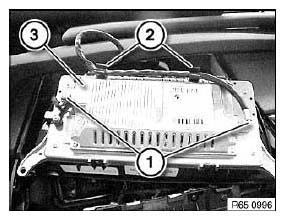
Fig. 38: Identifying Speaker Screws
READ NEXT:
 Removing And Installing Rear Cabin Monitor (Complete)
Necessary preliminary tasks:
Remove fresh-air grille in rear cabin.
Remove trim from rear cabin monitor base at front.
Release screws (1) and remove rear cabin monitor with holder (2).
Disconnec
Removing And Installing/Replacing Trim For Rear Cabin Monitor Base
At Rear
Special tools required:
00 9 340
Using special tool 00 9 340 , unclip trim (1) on both sides.
Fig. 43: Identifying Special Tool (00 9 340)
Unclip trim (1) with special tool 00 9 340 and remove.
Re
SEE MORE:
Tailgate - Vehicle key
Tailgate
General information
To avoid locking the vehicle key in the vehicle,
do not place the vehicle key in the cargo area.
The following settings are available for the operation
of the tailgate with the vehicle key:
Whether the vehicle key opens only the upper
tailgate or the upper and lower
Danger Of Poisoning If Oil Is Ingested/Absorbed Through The Skin
Danger of poisoning!
Ingesting oil or absorbing through the skin may cause poisoning!
Possible symptoms are:
Headaches
Dizziness
Stomach aches
Vomiting
Diarrhoea
Cramps/fits
Unconsciousness
Protective measures/rules of conduct:
Pour oil only into appropriately marked containers
Do not po
© 2019-2026 Copyright www.bmwx5info.com
