BMW X5: Operating concept
Principle
iDrive is the operating concept of the infotainment system and includes a large number of functions.
General information
These functions can be operated as follows:
- Via the Controller.
- Via the touchscreen.
- Via the BMW Intelligent Personal Assistant.
- Depending on the equipment: with the gesture control.
Safety information
Warning
Operating the integrated information systems and communication devices while driving can distract from traffic. It is possible to lose control of the vehicle. There is a risk of accident. Only use the systems or devices when the traffic situation allows. As warranted, stop and use the systems and devices while the vehicle is stationary.
Input and display
Main menu
General information
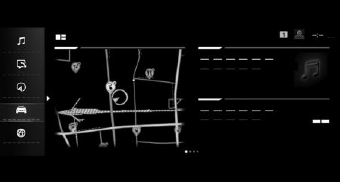
The main menu is divided into two areas. The left area contains menu items that can be used to call up all the iDrive functions. The right area contains widgets that provide quick access to certain functions.

Media/Radio
 All functions of the
entertainment system,
e.g., radio stations or connection with external
devices.
Communication
 Phone and message functions,
e-mail and
calendar, and also the connection and management
of mobile devices, such as smartphones.
Navigation
 Access to the navigation system,
destination
input and traffic bulletins. Configurable map
views and other functions, such as points of interest
and areas to be avoided.
My Car
 Information about vehicle status
and trips.
Access to the Integrated Owner's Manual and also administration of driver profiles and range of adjustments for vehicle and iDrive.
Apps
 Management of apps, access to
apps and vehicle
functions. Additional apps and vehicle functions
can be purchased from the BMW Store.
Widgets
 Widgets provide quick access to
frequently
used functions. The configured widgets
display dynamic contents such as the navigation
map, and serve as interfaces at the same time.
Letters and numbers
Letters and numbers can be selected when making the destination input, for example.
Letters and numbers can be entered using the Controller, the touchpad, touchscreen or voice control. The keyboard's display changes automatically.
 Change between capital and
lower-case letters.
 Enter a blank space.
 Switching between languages.
 Use voice control.
.gif) Confirm entry.
Confirm entry.
.gif) Slide the input area to the left
or
right.
Slide the input area to the left
or
right.
Entry comparison
When entering names and addresses, the choice is narrowed down with every letter and number and added automatically as needed.
Entries are continuously compared with data stored in the vehicle.
- Only those letters and numbers are offered during entry for which data is available.
- Destination search: place names can be entered in all languages that are available in iDrive.
Activating/deactivating the functions
Several menu items are preceded by a checkbox.
The checkbox indicates whether the function is activated or deactivated. Selecting the menu item activates or deactivates the function.
.gif) Function is activated.
Function is activated.
.gif) Function is deactivated.
Function is deactivated.
Status information
General information
The status field can be found in the upper area of the Control Display. Status information is displayed in the form of symbols.
Radio symbols
.gif) HD Radio station is being
received.
HD Radio station is being
received.
.gif) Satellite radio is switched on.
Satellite radio is switched on.
Telephone symbols
.gif) Incoming or outgoing call.
Incoming or outgoing call.
.gif) Missed call.
Missed call.
.gif) Signal strength of mobile phone
network.
Signal strength of mobile phone
network.
.gif) Network search.
Network search.
.gif) Mobile phone network is not
available.
Mobile phone network is not
available.
.gif) The critical charge state of the
mobile
phone has been reached.
The critical charge state of the
mobile
phone has been reached.
.gif) Roaming is active.
Roaming is active.
.gif) Locating is active.
Locating is active.
.gif) SMS text message received.
SMS text message received.
.gif) Message received.
Message received.
.gif) Reminder.
Reminder.
.gif) Sending not possible.
Sending not possible.
Entertainment symbols
.gif) Bluetooth audio.
Bluetooth audio.
.gif) USB device.
USB device.
.gif) Connected Music.
Connected Music.
.gif) WLAN.
WLAN.
.gif) Apple CarPlay.
Apple CarPlay.
.gif) Android Auto.
Android Auto.
Other symbols
.gif) Check Control message.
Check Control message.
.gif) Sound output active.
Sound output active.
.gif) Sound output deactivated.
Sound output deactivated.
.gif) Voice activation system
active.
Voice activation system
active.
.gif) Request for the current vehicle
position.
Request for the current vehicle
position.
.gif) Checking the current vehicle
position.
Checking the current vehicle
position.
.gif) Driver profile.
Driver profile.
.gif) Notifications.
Notifications.
.gif) Service notifications.
Service notifications.
.gif) Information.
Information.
.gif) Stop.
Stop.
.gif) Data protection.
Data protection.
.gif) Destination guidance active.
Destination guidance active.
.gif) Passengers on board.
Passengers on board.
.gif) Do not disturb.
Do not disturb.
Programmable memory buttons
General information
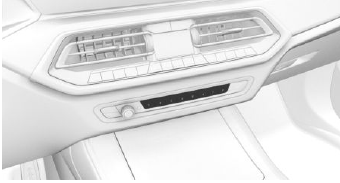
The iDrive functions can be stored on the programmable memory buttons and called up directly, for instance radio stations, navigation destinations, phone numbers and menu entries.
Overview

.gif) Programmable memory buttons
Programmable memory buttons
Storing a function
A function can be stored on a programmable memory button. A button with a stored function can be overwritten with another function.
1. Select function via iDrive, for instance radio station.
2. .gif) Press and hold the desired
button
until the displayed bar on the Control Display
has loaded completely.
Press and hold the desired
button
until the displayed bar on the Control Display
has loaded completely.
Executing a function
.gif) Press the button.
Press the button.
The function will work immediately. This means, for instance that the number is dialed when a phone number is selected.
Displaying the key assignment
Touch buttons with finger. Do not wear gloves or use objects.
The assignment of the buttons is displayed in the upper area of the Control Display.
Deleting all button assignments
All button assignments can be deleted.
1. Press and hold buttons 1 and 8 at the same time.
2. "OK".

