BMW X5: Intake Silencer
REMOVING AND INSTALLING/REPLACING INTAKE FILTER HOUSING (N52K)
Necessary preliminary tasks:
- Switch off ignition
Lever out expansion rivets (1).
Press lock (2) and raise intake duct (3).
Detach intake duct (3) from air filter housing and remove.
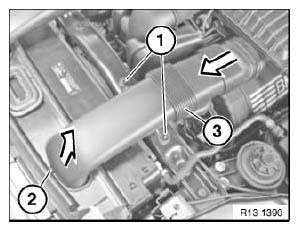
Fig. 8: Identifying Expansion Rivets, Lock And Intake Duct
Pull off plug (1).
Release clamp (2) and detach air intake hose.
Unclip line (3), detach intake filter housing (4) from bearing and remove.
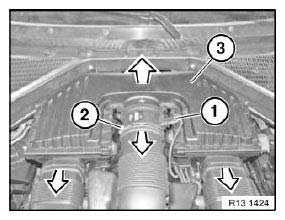
Fig. 9: Identifying Clamp And Intake Filter Housing
Air Cleaner
REPLACING BOTH AIR CLEANER ELEMENTS (N52K)
Necessary preliminary tasks:
Switch off ignition.
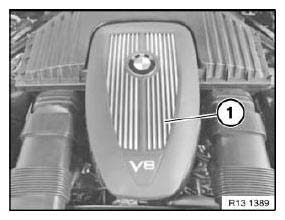
Fig. 10: Identifying Cover
Pull off plug (1).
Release clamp (2) and detach air intake hose.
Open retainers and remove upper section (3) of intake filter housing.
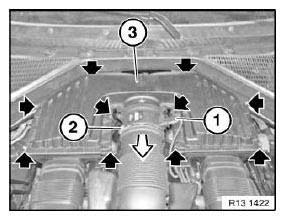
Fig. 11: Identifying Plug, Clamp And Upper Section
Remove air cleaner element (1).
Installation:
Clean upper and lower sections of intake filter housing from inside.
Insert new air cleaner elements.
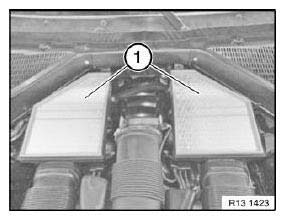
Fig. 12: Identifying Air Cleaner Elements
Carbon Canister Ventilation
REPLACING TANK VENT VALVE ((N52 / N52K / N51 / N53)
Necessary preliminary tasks:
- Check stored fault messages
- Switch off ignition
- Remove throttle valve assembly
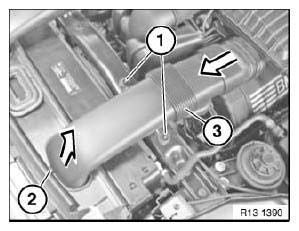
Fig. 13: Identifying Expansion Rivets, Lock And Intake Duct
Installation location:
Tank vent valve is fitted at bottom on intake air manifold.
Unlock plug (1) and remove.
Unlock hose (2) and detach.
Unlock hose (3) on intake manifold and detach.
Detach tank vent valve (4) from bracket and remove.
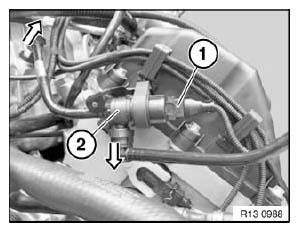
Fig. 14: Identifying Plug And Tank Venting Valve
NOTE: Read out fault memory of DME control unit.
Now clear the fault memory.

